Needle Size Guide for Natural Hairlines with 0.6mm to 1.1mm Implanters

A natural hairline can fail for a very small reason: the needle is too large, too small, or poorly matched to the graft. In hair restoration, a fraction of a millimeter changes how a graft enters the scalp, how much tissue is displaced, how the hair exits the skin, and how soft the final hairline appears.
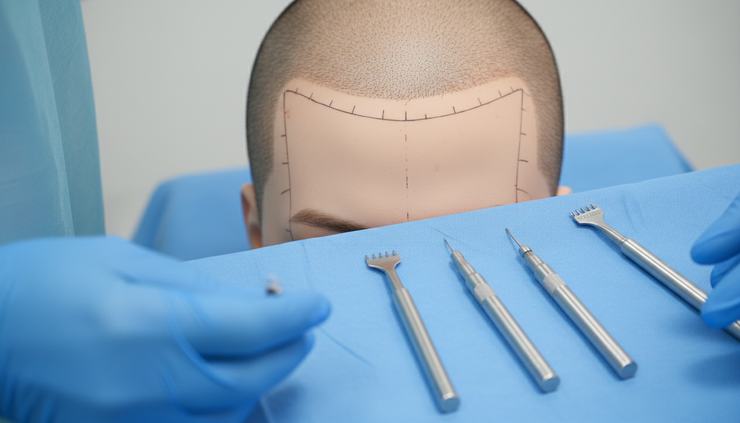
Implanter needles from 0.6 mm through 1.1 mm give clinicians a practical range for placing single-hair and multi-hair follicular units across different hair types. The goal is not to choose the smallest possible diameter. The goal is to choose the smallest diameter that allows safe, controlled placement without crushing, bending, drying, or forcing the graft.
This guide explains how needle diameter affects hairline design, graft handling, density, and patient-specific planning. It is intended for clinical education, not as a substitute for formal surgical training or patient-specific medical judgment.

Why needle diameter changes the look of a hairline
Hairlines look natural when they avoid obvious patterns. The front edge should have soft irregularity, fine single hairs, correct exit angles, and gradual transition into denser central zones. Needle size affects several of these features at once.
A narrower needle can help create smaller recipient channels, especially along the frontal edge where single-hair grafts matter most. Smaller channels may support closer placement when tissue conditions allow it. They can also reduce visible spacing between fine hairs. But a needle that is too narrow can damage the graft during loading or placement.
A larger needle gives more room for thicker grafts, multi-hair units, and follicles with more surrounding tissue. It may reduce squeezing and bending during insertion. But larger channels can create unnecessary tissue trauma if used for fine grafts, especially in the first rows of the hairline.
The clinical question is simple, but the answer changes case by case:
Choose the needle that fits the graft comfortably while preserving the smallest practical recipient channel.
That fit depends on hair shaft caliber, follicular unit size, graft trimming style, curl, skin thickness, and the placement zone.
The practical range from 0.6 mm to 1.1 mm
The 0.6 mm to 1.1 mm range covers most implanter use in modern hairline work. The exact system, needle wall thickness, bevel, and loading method can vary by manufacturer, so clinicians should treat diameter as one part of the decision rather than the whole decision.
Needle diameter | Common clinical use | Best suited for | Main caution |
0.6 mm | Very fine single-hair grafts | Soft frontal micro-irregularity | Higher risk of graft compression if the graft is not extremely slim |
0.7 mm | Fine single hairs in the leading edge | Refined hairlines with fine shafts | Requires careful graft preparation and loading |
0.8 mm | Standard single-hair grafts and some small two-hair grafts | Most frontal hairline work | May still be tight for coarse or curved follicles |
0.9 mm | Larger singles and two-hair grafts | Transition zone behind the first rows | Can look too aggressive if overused at the very front |
1.0 mm | Two-hair and selected three-hair grafts | Mid-scalp transition and density building | Not ideal for delicate feathering |
1.1 mm | Larger multi-hair grafts or bulky grafts | Posterior zones, selected coarse grafts | Larger channels need careful spacing and angle control |
This table gives a working framework, not a fixed protocol. Two grafts labeled “single hair” can behave very differently. A fine, straight single may pass easily through a 0.7 mm needle. A coarse, curved single with more perifollicular tissue may need 0.8 mm or 0.9 mm to avoid trauma.
Matching needle size to hair shaft caliber
Hair shaft caliber is one of the strongest visual drivers in hairline planning. Fine hair creates softer edges and usually tolerates smaller implanters. Coarse hair gives more coverage per graft, but it can look pluggy if placed too densely or too far forward with large channels.
Fine hair usually benefits from smaller diameters
Patients with fine hair often need more strategic density because each hair contributes less visual coverage. In the frontal hairline, 0.6 mm to 0.8 mm implanters may help place slim single-hair grafts with minimal tissue displacement.
The key is graft quality. Fine hair does not automatically mean tiny grafts. If the follicle has extra tissue or an angled bulb, forcing it through a 0.6 mm needle can cause bending or desiccation during repeated attempts. A slightly larger needle may produce a better result because the graft enters cleanly.
Medium hair often sits in the middle range
Many hairline cases use 0.8 mm to 0.9 mm implanters for most single-hair placement, with smaller needles reserved for the most anterior feathering. This range offers a practical balance between precision and safe loading.
For example, a clinician might use 0.7 mm needles for the first scattered row, 0.8 mm for the next few rows, and 0.9 mm for stronger two-hair units farther back. This gradual change helps the hairline avoid a hard border.
Coarse hair needs more room and more discipline
Coarse hair shafts occupy more space. The follicular units may also feel bulkier during loading, particularly if grafts retain protective surrounding tissue. In these cases, 0.9 mm to 1.1 mm needles may protect grafts better than forcing smaller sizes.
The aesthetic challenge comes at the front edge. Coarse hair can look abrupt if the first rows use strong, thick hairs in a straight line. Smaller needles alone cannot solve that. The plan should include careful graft selection, irregular spacing, acute angles, and the finest available single hairs for the leading edge.

Choosing sizes by hairline zone
A natural hairline is not one uniform band. It has zones, and each zone may call for a different needle diameter.
The leading edge needs the softest placement
The first visible hairs should usually be single-hair grafts placed with slight irregularity. This is where 0.6 mm, 0.7 mm, and 0.8 mm implanters appear most often, depending on graft size.
The purpose is not to create maximum density in the first row. The purpose is to create a soft transition from bare forehead to visible hair. Overpacking the edge can create an artificial wall, even when the angles are technically correct.
Useful principles for the leading edge include:
Select the finest single-hair grafts available.
Avoid placing large grafts in the first few rows.
Use small needles only when grafts pass without resistance.
Vary spacing enough to avoid a drawn-on border.
Match exit angle to the native hair pattern.
The transition zone builds visual density
Behind the first rows, the hairline needs more coverage. This is where 0.8 mm and 0.9 mm needles often become useful, especially for stronger single-hair grafts and small two-hair units.
The transition zone should not suddenly change from delicate singles to dense multi-hair grafts. A gradual shift helps the eye read the work as natural growth. Clinicians can blend smaller and larger diameters across a few millimeters rather than making a sharp switch.
The core frontal zone can accept larger grafts
Farther behind the visible hairline, two-hair and selected three-hair grafts create coverage. 0.9 mm, 1.0 mm, and 1.1 mm implanters may be appropriate here, especially with thicker hair shafts or bulkier follicular units.
Even in this zone, angle and direction remain critical. A well-sized needle cannot compensate for poor orientation. If grafts exit too upright at the frontal scalp, the result may look unnatural despite good survival.
How curl and follicle shape affect needle choice
Curly and wavy hair can provide excellent visual coverage, but it demands careful handling. The shaft above the skin gives only part of the story. The follicle beneath the skin may curve as well. Curved follicles can be harder to load into narrow implanter needles without bending the bulb or stressing the graft.
For curly hair, clinicians often need to size the needle based on the shape of the follicular unit, not only the visible hair shaft. A slightly wider needle may reduce mechanical stress during loading and insertion.
This does not mean curly hair always requires the largest needle. Some curly single-hair grafts are still fine and compact. The right choice comes from direct inspection under magnification and feedback during loading.
Signs that a needle may be too small include:
Resistance when the graft enters the needle.
Repeated graft bending during loading.
Visible compression of tissue around the follicle.
Slow placement because the team must force alignment.
Increased popping or poor seating in the recipient site.
When these signs appear, moving up by 0.1 mm can protect graft integrity and improve placement rhythm.

Balancing density with tissue preservation
Density planning often tempts clinicians toward smaller channels and closer placement. Smaller implanters can help, but scalp tissue has limits. High-density placement with any needle size can increase trauma if spacing, angle, and bleeding control are not respected.
Needle size affects three density-related factors.
Channel size
Smaller needles create smaller openings when all other design factors remain similar. This can help preserve tissue bridges between sites. Tissue bridges support healing and may reduce the risk of graft displacement.
Graft fit
A graft should sit securely without being crushed. If the channel is too small, the graft may not seat properly. If the channel is too large, it may wobble, sit at the wrong depth, or create more visible crusting.
Placement speed
Implanters can support efficient placement, but speed should not override graft safety. A needle that is slightly too small can slow the team because each graft takes more effort to load. Over time, that can increase graft exposure outside the body.
The best density comes from a stable rhythm: trimmed grafts, correct hydration, appropriate needle size, controlled depth, and consistent angle.
How skin characteristics influence selection
Scalp tissue varies widely. Some patients have thin, mobile skin. Others have thicker, more fibrotic tissue, especially in repair cases or areas with prior surgery.
In thin skin, oversized needles can create visible trauma and make angle control harder. Smaller diameters may help, but only if the graft fits well.
In thick or firm skin, very small needles may bend, drag, or fail to create a clean path for the graft. A larger diameter may allow smoother placement and better seating. Clinicians may also adjust depth and angle to match tissue resistance.
Bleeding tendency matters too. More bleeding can reduce visibility and increase popping. Needle selection cannot solve bleeding alone, but minimizing unnecessary channel size may help as part of careful technique.
Building a practical sizing strategy
A useful clinical strategy starts before implantation. The team should sort grafts by hair count, shaft caliber, follicle shape, and tissue bulk. Then the surgeon can assign needle sizes to zones instead of relying on one diameter for the entire case.
A common planning sequence looks like this:
Inspect grafts under magnification.
Confirm which singles are truly fine enough for the leading edge.
Test loading with the intended needle.
The graft should enter smoothly without folding or scraping.
Map the hairline by zones.
Use smaller diameters for feathering and larger sizes as graft size increases behind it.
Watch tissue response during placement.
Popping, excessive resistance, or poor seating may signal a mismatch.
Adjust in small steps.
Moving from 0.7 mm to 0.8 mm can be enough. Jumping too large may sacrifice refinement.
This approach keeps the decision grounded in what the tissue and grafts show during the case.
Common mistakes when choosing implanter needles
The most common error is assuming smaller always means better. A 0.6 mm needle can create beautiful detail with the right graft. With the wrong graft, it can increase handling trauma and make placement less predictable.
Another mistake is using one needle size across the full frontal region. Hairlines need gradients. The first row, transition zone, and central frontal scalp all have different visual jobs.
A third mistake is ignoring the hair shaft’s visual strength. Coarse hair placed too far forward can look unnatural even if the needle is small. Fine hair placed too sparsely can look weak even if the technical placement is clean.
Clinicians should also avoid treating diameter as separate from bevel design, needle sharpness, graft preparation, and implantation angle. A dull or poorly matched needle can harm the result regardless of nominal size.
A simple clinical framework for natural results
Needle diameter should follow three questions.
What does the graft need?
The graft must pass through the implanter without compression, folding, or repeated manipulation.
What does the zone need?
The leading edge needs softness. The transition zone needs blend. The frontal core needs coverage.
What does the tissue allow?
Scalp thickness, mobility, bleeding, and prior surgery all affect the best size.
For many cases, the smallest practical needle belongs at the very front, moderate diameters belong in the transition zone, and larger diameters belong behind the hairline where multi-hair grafts add density. The exact numbers vary, but the logic stays consistent.
A refined hairline rarely comes from one perfect needle. It comes from matching 0.6 mm to 1.1 mm implanters to the graft, the zone, and the patient’s hair characteristics in real time. When the needle fits the graft and the plan respects natural hairline architecture, the result can look softer, denser, and more believable.


Comments